Thursday, December 22, 2011

Happy Holidays!!!

Thank you to everyone that helped support us this holiday season. We put in a lot of over time trying to fill orders and get them out in time to land under a someone's Christmas tree. We will be closing the shop for a week or so but we should be open for the new year.

Also we have a couple of new dealers! You can find our bags at the newly opened Huckleberry Bicycles on Market Street in SF very close to one of my most favorite resturants, Tu Lan. We also sent a big batch of bags across the pond to Kitchener in Switzerland. We are looking to add a more shops in the new year.

We hope everyone has a safe and happy holiday season and a great new year!

Laplander Christmas Party

Monday, October 10, 2011

New bags and updates

I've been neglecting this blog for a while but lots have been going on in Philadelphia's Lapland.

Our biggest news 'literally' is our new workshop!
Laplander was moved out of our home and into a big beautiful space in Philadelphia's Germantown neighborhood.
I recently fixed up a old industrial Singer from the 1930's to use for lighter fabric. After lots of cleaning and oiling, refinishing the table, swapping out the motor and gutting the old lamp we have a great machine.

Lately we have been getting some great feedback from some of our customers who have also been sending some great photo's!

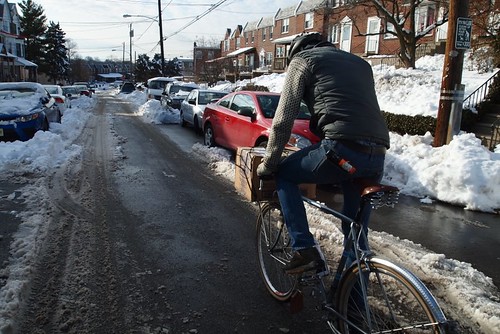
Like this one of our Pro Mechanics Apron being employed on Market street in SF by Huckleberry Bicycles.

And this one of one of our Porteur Packs looking at home on a pass in Washington.

These are some our Vegan City panniers in Ontario.

As a result of customer feedback we have added a new feature to our City Panniers, a U-lock holster!
This works for both our preferred pocket locks and larger locks as well. We are also doing some tweaks to our Porteur Pack to make it a bit more weather resistant.
We are also getting much closer to releasing a front bag to be used on small rando front racks like the nitto M12. I was putting my prototype bag though its paces until that bike had to make its yearly transition into my cyclocross pit bike.
And speaking of cyclocross, a race bag is also on the short list of projects for this season. We have some great ideas for a nice big bag to help keep organized for those weekends when you pack more for an hour of racing then a two week vacation.

Thanks and keep your photos and feedback coming.
Have a good one,
Shane

Saturday, March 19, 2011

Lessons From the Rain

First off, thank you to everyone for bearing with us these last couple of weeks as we have moved our home and shop to South Philadelphia. Things are getting back to normal and our sewing machine is back humming away working on new bags.
A few weeks ago I made a delivery to Heather and Fuzzy from Bicycle Revolutions of bags for their new store, opening a couple blocks down from their old location on fabric row. It was dark and gray mid-day and a heavy winter rain had fell steadily for days. It was a perfect day for more "product testing" with my prototype Porteur Pack.
After twenty cold and wet miles in the driving rain I looked closely at the inside of my bag. The waxed fabric was soaked on the outside but remained dry on the inside. Water had entered in at seams on the front of the bag. As a result I am now making a couple of small changes in fabrication to help further weather-proof that bag.
The bag on the right is my old prototype bag with a small lip of fabric that holds rain and lets it penetrate the seam. The bag on the left is the same part with the new construction that allows the rain to roll off. It takes longer to fabricate but it is better.

This is the inside of a new Porteur Pack. All the seams that meet the outside of the bag have been sealed, by hand, with a natural wax and oil paste.
I only wish the designers of my rain pants had thoroughly tested them before sending the design off to Asia to have thousands made. That day rain quickly made its way though the zipper fly of my pants and several miles later my jeans were soaked in the worst way. Not enough companies take the time to test their products, or will take steps to improve a model that has been released. They simply replace it with the next season with another untested product.
Similar improvements to our products have come directly from customer feedback. So when we say love to hear what you have to say about our bags, we really mean it. We are not stuck with a hundred year old design that ignores changes in bicycles and the way they are used. We want to make a product that is consistently better.
Have a good one,
Shane

Monday, February 21, 2011

Laplander Bags at Bespoke in Brooklyn

We finished a batch of bags for Bespoke Bicycles in Brooklyn, NY. Check them out in Fort Greene.
Batch of bags on their way to NYC "by mail"

Monday, January 3, 2011

Porteur Rack Bag

This is our latest Porteur rack bag. It is based around the idea of making a bag that increases the capacity of the rack, mounts securely to the rack as well as is easy to dismount, and quickly converts into a back pack.

This bag has been designed around the VeloOrange Porteur Rack. We can make a similar version of this bag for several widely available racks like, Cetma, Gamoh. All of the listed racks are available from our good friends at Bicycle Revolutions here in Philadelphia. We can also do custom sizes for your custom rack.
For right now we will be offering this bag as a made to order item. If you are interested in this bag please contact us and let us know what rack you have and its dimensions. We can also make a drop-in cooler for summer grocery trips when you don't want your ice cream to melt in 95 degree heat.
We will also be releasing a large duffel style bag soon that is also designed specifically for porteur racks. For more information and photos, please visit our website.
Thank you and Happy New Year.

Monday, December 6, 2010

Mike's Wallet: Part Two

This is 24 hours later, the leather is dry.
First use a channel gouge tool to cut channels in the leather where stitches will go.I then wet the leather around the channels and use a marking wheel to mark where I will stitch.
A small piece of chrome tan leather is cut for the back to make the ID sleeve and a edging tool bevels the edges.
I glue the chrome tan leather to the veg tan back and spread contact cement to the front and backs on the perimeter. The two pieces are pressed together and I start hand stitching. I use a traditional saddle stitch method of sewing for strength. It requires you to stab a hole with a hand awl and use two needles to sew heavy waxed thread though the holes.
All stitched up.
I used black dye to paint in the logo.
I then beveled the edges and rubbed them with a edge tool.And coco color stain to pigment the leather.
After a quick wipe with a damp cloth the leather takes a beautiful new tone.
After using edge dye, some softening oil, wax and adding the fastener its all done!

Saturday, December 4, 2010

A New Roadie Wallet: Part One

A little while back, I (Shane) was making cycling "wallets" that fit into your jersey pocket. They are big enough for your basic road training kit: 700x 23c tube, tire lever, CO2, multi-tool, patch kit, ID, and some cash. I was mostly making them for myself and close friends, but they are now available for sale upon request...

I'm making two of them in a new style. One is for my teammate Mike and one is a X-mas present.
The older style was made out of chrome-tan leather, but I'm now making these out of vegetable-tanned leather (treated with only vegetable tannins) which is stiffer and holds it shape very well. Most of the leather we use on our bags is "veg-tan". Hopefully the following will give you a little insight into the process we go though with all of our leather.

This particular wallet is being made for a friend, so I am embossing his team logo into it.

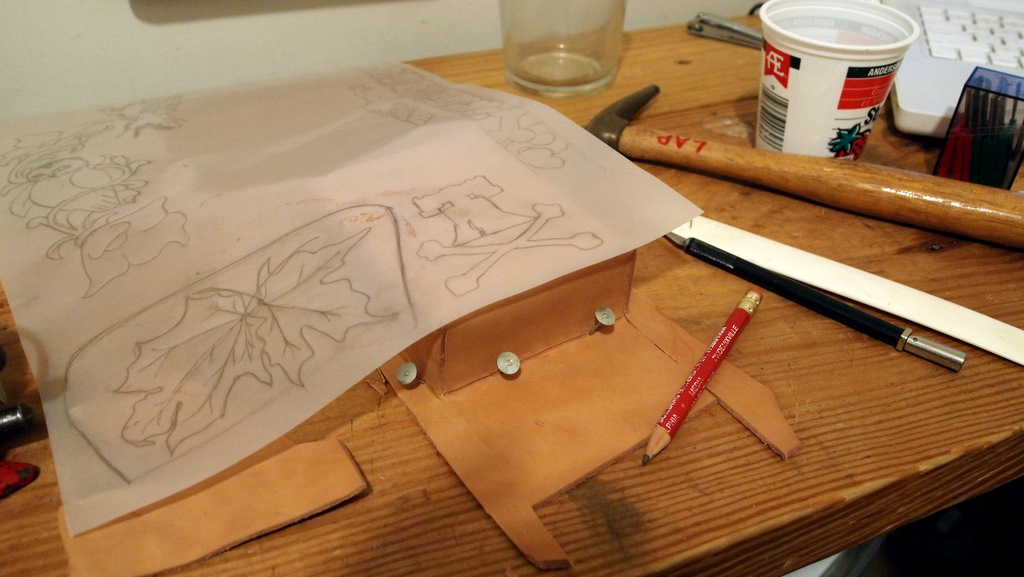
Firstly, the leather is cut from the hide and soaked in water to make it pliable and elastic. When it is wet it can also be marked with pressure. The leather is then tacked over a wooden form.
The ends are then trimmed flush .
So now the basic shape is there, the opposite end is open. Now while the leather is still wet I can trace the design onto the leather.
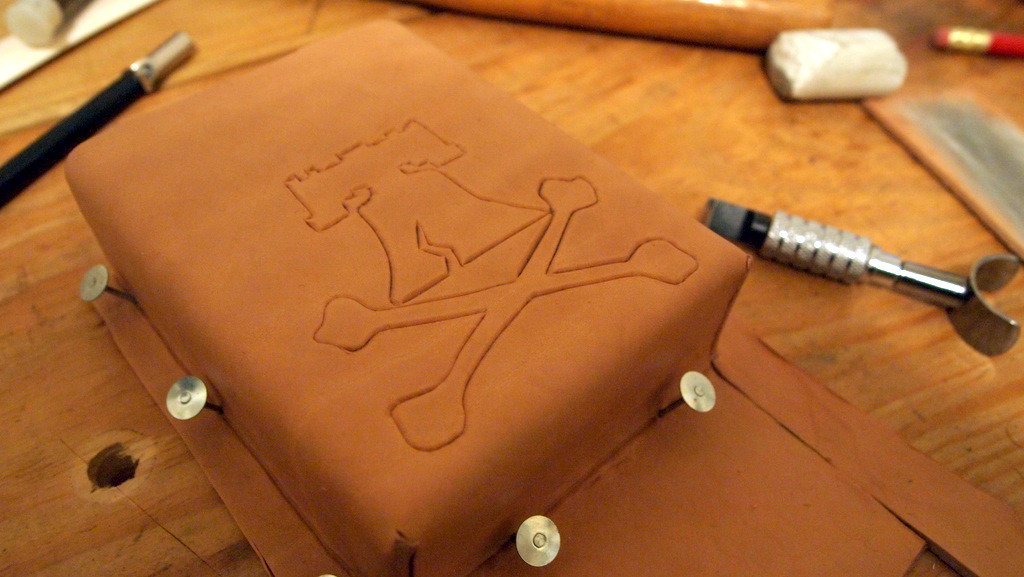
After the design has been traced, a light impression is left on the leather and I can then use my swivel knife to do the outline.
After the swivel knife, I use a edging tool, pare tool and a wooden mallet to stamp down the areas inside the lines and give it texture.
The piece of leather now needs to dry before I can trim the edges and start sewing.

Next I want to start work on the back and lid which will be made from another piece of leather. I use a long piece that has been soaked in water. Two lines are scored into the back of the leather so the top folds neatly. Next, I stamp Mike's initials into the top.
This too needs to dry overnight before it can be trimmed and sewn.
More fun tomorrow.
Shane