A little while back, I (Shane) was making cycling "wallets" that fit into your jersey pocket. They are big enough for your basic road training kit: 700x 23c tube, tire lever, CO2, multi-tool, patch kit, ID, and some cash. I was mostly making them for myself and close friends, but they are now available for sale upon request...
I'm making two of them in a new style. One is for my teammate Mike and one is a X-mas present.
The older style was made out of chrome-tan leather, but I'm now making these out of vegetable-tanned leather (treated with only vegetable tannins) which is stiffer and holds it shape very well. Most of the leather we use on our bags is "veg-tan". Hopefully the following will give you a little insight into the process we go though with all of our leather.
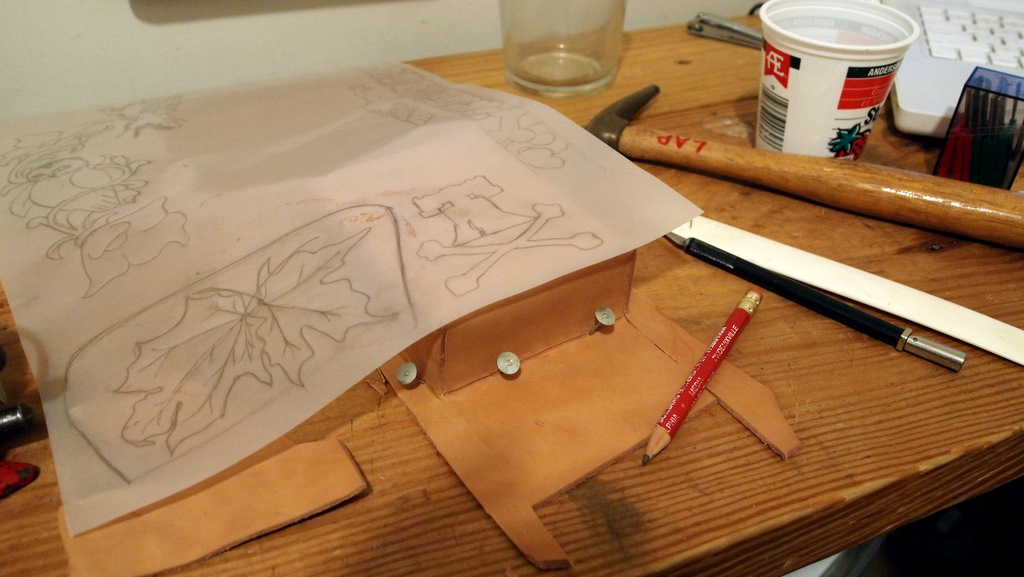
This particular wallet is being made for a friend, so I am embossing his team logo into it.
Firstly, the leather is cut from the hide and soaked in water to make it pliable and elastic. When it is wet it can also be marked with pressure. The leather is then tacked over a wooden form.

The ends are then trimmed flush .

So now the basic shape is there, the opposite end is open. Now while the leather is still wet I can trace the
design onto the leather.

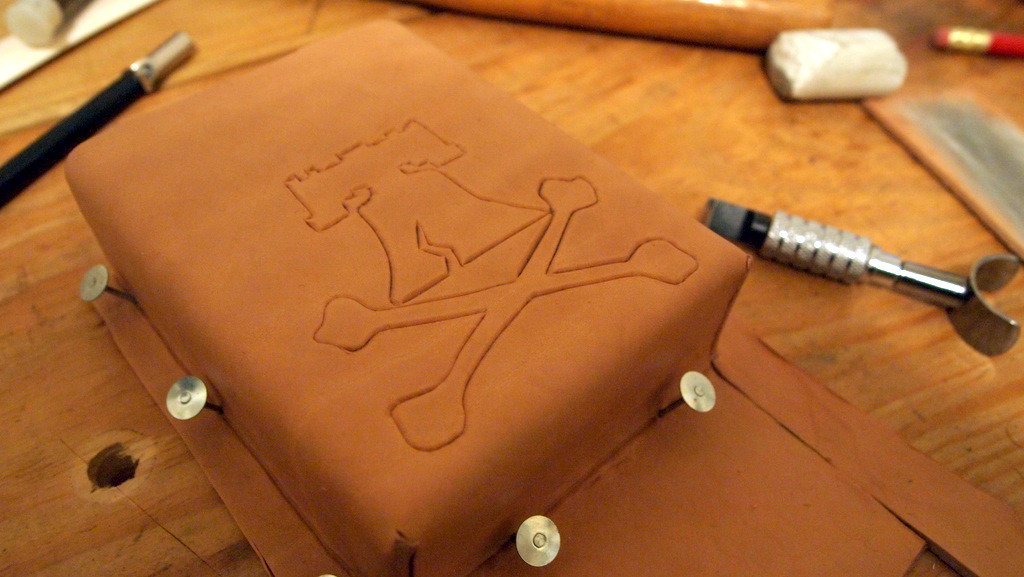
After the design has been traced, a light impression is left on the leather and I can then use my swivel knife to do the outline.

After the swivel knife, I use a edging tool, pare tool and a wooden mallet to stamp down the areas inside the lines and give it texture.

The piece of leather now needs to dry before I can trim the edges and start sewing.
Next I want to start work on the back and lid which will be made from another piece of leather. I use a long piece that has been soaked in water. Two lines are scored into the back of the leather so the top folds neatly. Next, I stamp Mike's initials into the top.

This too needs to dry overnight before it can be trimmed and sewn.
More fun tomorrow.
Shane

 First use a channel gouge tool to cut channels in the leather where stitches will go.
 I then wet the leather around the channels and use a marking wheel to mark where I will stitch.
 A small piece of chrome tan leather is cut for the back to make the ID sleeve and a edging tool bevels the edges.
 I glue the chrome tan leather to the veg tan back and spread contact cement to the front and backs on the perimeter.
  The two pieces are pressed together and I start hand stitching. I use a traditional saddle stitch method of sewing for strength. It requires you to stab a hole with a hand awl and use two needles to sew heavy waxed thread though the holes.
 All stitched up.
 I used black dye to paint in the logo.
 I then beveled the edges and rubbed them with a edge tool.
 And coco color stain to pigment the leather.
 After a quick wipe with a damp cloth the leather takes a beautiful new tone.
 After using edge dye, some softening oil, wax and adding the fastener its all done!